

Key Takeaways
Why Fluid Checks Matter More Than You Think
Your car relies on several different fluids to keep its systems running safely. Each one lubricates, cools, pressurizes, or protects a specific part of the vehicle. When levels drop - or when a fluid degrades - performance suffers and components wear out faster. The good news: checking them takes about 15 minutes and costs nothing.
Fluid checks are one of the simplest tasks covered in your car's maintenance schedule, yet they're among the most commonly skipped. Get into the habit of doing a quick inspection once a month or before any long road trip.
What you will need
What You'll Need Before You Start
Fluid checks are genuinely low-barrier. Gather a few basics before popping the hood.
Clean rag or paper towels
Wipe the oil dipstick clean between readings to get an accurate level.
Vehicle owner's manual
Identifies the correct fluid types and shows a diagram of your specific engine bay layout.
Flashlight or phone torch
Helps you see fluid levels clearly in translucent reservoirs or dark engine bays.
Funnel
Prevents spills when topping off fluids in narrow reservoir openings.
Park on a flat, level surface before you begin. A slope can throw off dipstick readings and make it harder to spot leaks. Also, make sure the engine has been off for at least 30 minutes - or check first thing in the morning before starting the car.
Always Check Fluids on a Cold Engine
Hot engines and pressurized cooling systems can cause serious burns if caps are opened unexpectedly. Let the car sit for at least 30 minutes after driving before inspecting coolant or removing any reservoir cap. Engine oil is also best read cold for the most accurate dipstick measurement.
The Five Fluids and How to Read Each One
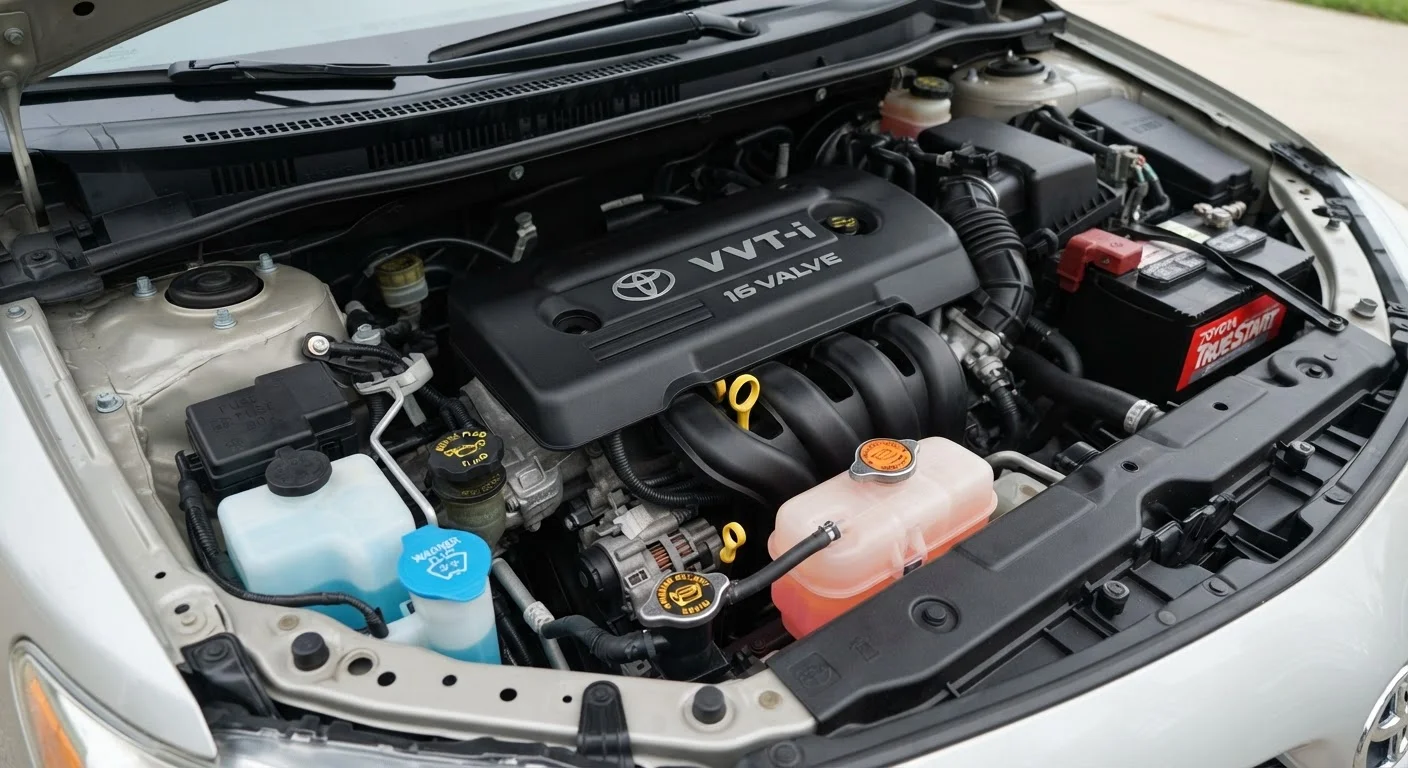
Open the hood and locate each reservoir using the icons printed on the caps - most manufacturers use standardized symbols. Your owner's manual will show a labeled diagram of your specific engine bay if you're unsure.
Check Engine Oil
Pull out the oil dipstick - usually a brightly colored ring or handle. Wipe it clean with your rag, reinsert it fully, then pull it out again. The oil should fall between the two marks at the bottom of the stick. Color matters: new oil is amber; dark brown is normal wear; black or gritty oil is overdue for a change. A milky, frothy appearance signals water contamination - see a mechanic immediately.
Check Coolant (Antifreeze)
Find the translucent plastic coolant reservoir - usually near the radiator. You can read the level through the side of the bottle without opening it; look for MIN and MAX lines. Coolant should be bright green, orange, or pink depending on the type your car uses. A murky brown color or visible debris is a red flag.
Check Brake Fluid
The brake fluid reservoir is a small, translucent plastic container mounted on top of the master cylinder near the back of the engine bay (driver's side). Read the level through the side - it should sit between MIN and MAX. Brake fluid is typically clear to pale yellow when fresh. Dark brown or black fluid means it has absorbed moisture and should be flushed by a professional.
Check Power Steering Fluid
Not all modern vehicles have a power steering fluid reservoir - many newer cars use electric power steering, which requires no fluid. If yours does have one, locate the reservoir (often labeled with a steering wheel icon), and check the level using either the dipstick built into the cap or the MIN/MAX lines on the side. The fluid should be clear to light amber; dark or burnt-smelling fluid needs professional attention.
Check Windshield Washer Fluid
The washer fluid reservoir is typically the largest translucent container in the engine bay, marked with a windshield or water spray icon. This is the only fluid where running low won't damage your engine - but an empty reservoir is a safety issue in bad weather. Top it off with premixed washer fluid. Do not substitute plain water, which can freeze and crack the reservoir in cold temperatures.
If a fluid is consistently low despite topping it off, that points to a leak - a mechanic should inspect it. Similarly, if your dashboard warning lights lit up before you opened the hood, fluid level is one of the first things to check.
Make It a Habit With One Simple Trigger
Tie your fluid checks to something you already do regularly - like filling up with gas once a month or rotating your tires. A consistent trigger makes it far easier to remember. A quick visual check of all five reservoirs takes about five minutes once you know where to look.
When to Stop DIY and Call a Professional
Fluid checks are safe for any beginner, but some findings call for professional help. Take the car to a qualified mechanic if you notice:
- A fluid that keeps dropping even after you've topped it off - that's a leak.
- Brake fluid that looks nearly black or feels gritty - this signals contamination, and brakes are a safety-critical system. See our guide to brake wear signs for more detail.
- Coolant that's a murky brown instead of its normal bright color - this can indicate a head gasket problem.
- Any fluid that smells strongly burnt, or engine oil that looks like chocolate milk (a sign of coolant mixing in).
Routine fluid maintenance pairs naturally with seasonal upkeep. Our seasonal car care guide covers how fluid needs shift between summer heat and winter cold. Building these checks into your regular ownership habits is one of the most cost-effective things you can do for a vehicle's long-term health.
Brake Fluid Is a Safety-Critical System
Never ignore low or contaminated brake fluid. Unlike other fluids, brake fluid directly affects your ability to stop the vehicle. If the brake fluid level is low and you haven't had recent brake work done, it could indicate a leak or severely worn brake pads. Have the system inspected by a qualified mechanic before driving further.