

Key Takeaways
Understanding What's Behind Your Wall
Before you drive a single screw, it helps to understand what your wall is actually made of. In most US homes built after the 1950s, interior walls are drywall - a gypsum plaster core pressed between two sheets of thick paper. Older homes may have plaster-and-lath walls, which are denser and behave differently with fasteners. Some basement or garage walls may be masonry (concrete or brick), which requires entirely different hardware.
Inside all of these wall surfaces run studs - vertical wooden or metal framing members, typically spaced 16 or 24 inches apart. Studs are what give a wall its structural backbone, and they are by far the most reliable place to anchor anything heavy. That said, it's worth understanding the broader picture: for a deeper look at how walls work structurally, see our article on what load-bearing actually means before tackling any large project.
When you can't land a screw in a stud - which happens often when you need a specific placement for art or a shelf bracket - wall anchors are the solution. They work by distributing the load across a larger area of drywall rather than relying on a single point.
What you will need
Choosing the Right Hardware for the Job
Not all anchors are created equal. The type you need depends on two things: the weight of what you're hanging and the wall material behind your surface.
- Plastic expansion anchors: The most common type, suitable for lightweight items (up to about 20 lbs). You drill a hole, tap the anchor in, and drive the screw - the anchor expands and grips the drywall. Good for small frames and hooks.
- Self-drilling ("E-Z Anchor") anchors: Thread directly into drywall without pre-drilling. Rated for medium-weight loads, typically 25-50 lbs depending on the product. Easier for beginners.
- Toggle bolts ("butterfly anchors"): Heavy-duty option. A spring-loaded metal wing opens behind the drywall and distributes weight across a large area. Suitable for heavier items - often rated for 50 lbs or more in drywall.
- Masonry anchors: For concrete or brick walls, you need a hammer drill and masonry-specific anchors. This is a different process from standard drywall work.
Every anchor package lists a weight rating - treat this as a firm ceiling, not a suggestion. When in doubt, choose an anchor rated well above your item's actual weight. If you're planning to add wall-mounted storage as part of a larger organization project, understanding vertical versus horizontal storage can help you plan where and what to hang.
Stud finder
Locates wooden or metal studs behind drywall so you can drive screws into solid framing.
Power drill
Drills pilot holes for anchors and drives screws quickly and accurately.
Bubble level
Ensures your item hangs straight rather than at an unintended angle.
Tape measure
Measures spacing between hanging points and distances from corners or ceilings.
Wall anchors (appropriate type for your load)
Provides a secure fastening point in drywall when no stud is available.
Pencil
Marks stud locations and drill points on the wall without permanent marks.
Bathroom scale
Measures the actual weight of your item so you can choose correctly rated hardware.
Step-by-Step: How to Hang Something Securely
Follow these steps whether you're hanging a framed print, a small shelf, or a mirror. The process scales up or down depending on weight.
Weigh your item and identify the hanging hardware it needs
Place your item on a bathroom scale to get its actual weight. Check the back of the item for any manufacturer-recommended hardware. Items under 5 lbs can typically use adhesive strips or small plastic anchors. Items 5-30 lbs generally need self-drilling anchors or a stud. Anything over 30 lbs should go into a stud or use heavy-duty toggle bolts.
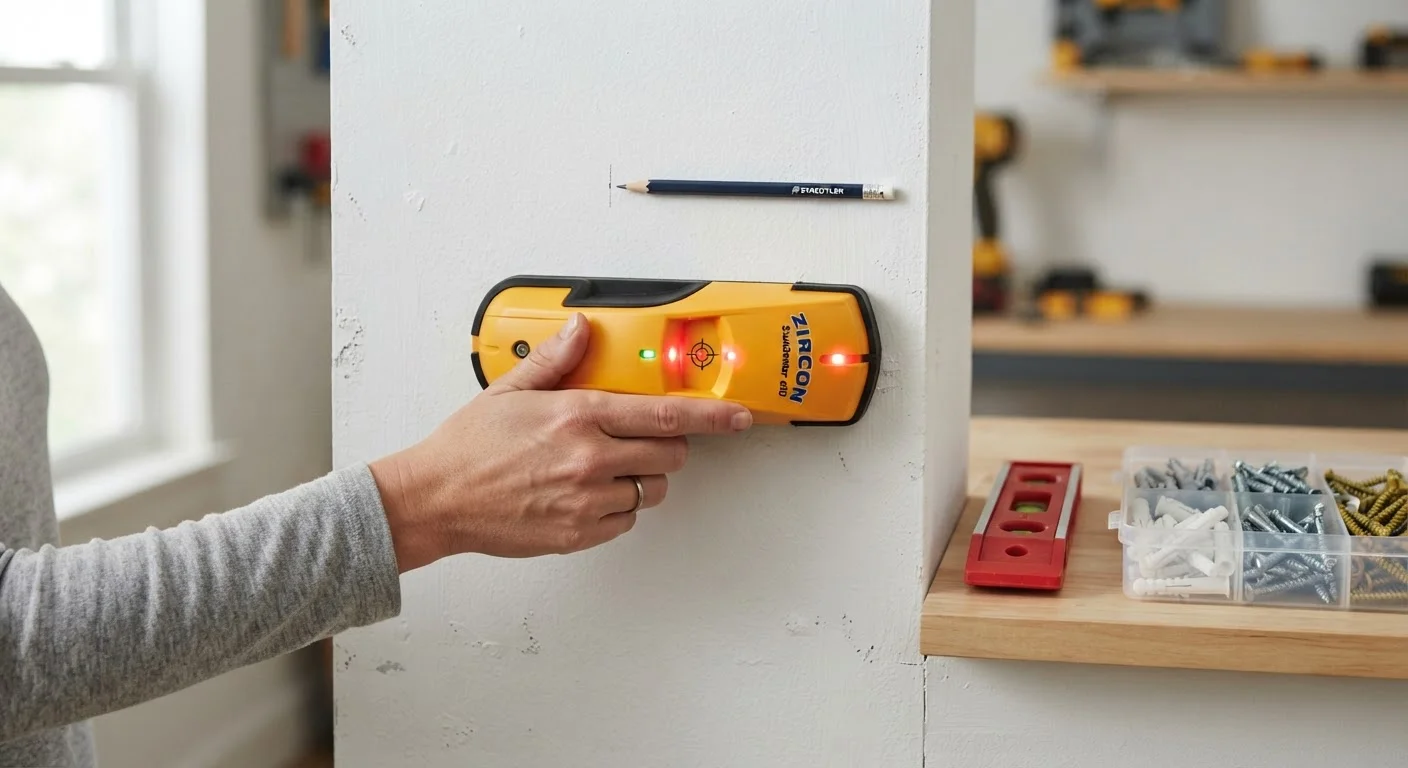
Scan the wall with a stud finder
Hold the stud finder flat against the wall and move it slowly from left to right. Most electronic models beep or light up when they detect a stud edge. Mark both edges of the stud with a pencil, then find the center - that's where you'll drive your screw for maximum grip. Repeat across the area where you plan to hang your item.
Mark your drill points with a level
Hold your item or its hanging bracket against the wall at the desired height. Use a pencil to lightly mark where each fastener needs to go. Then use a bubble level across those marks to confirm they're even before you drill. For items with two hanging points, measure the distance between those points on the item itself and transfer that measurement to the wall.
Drill pilot holes and install anchors (if not using a stud)
If your marks land on a stud, skip straight to driving the screw - no anchor needed. If you're going into open drywall, select the correct anchor for your load. For plastic expansion anchors, drill a hole matching the anchor's diameter, tap the anchor flush with the wall surface using a hammer, then drive in the screw. For self-drilling anchors, simply thread them directly into the drywall with a screwdriver until flush, then insert the screw. For toggle bolts, drill a larger hole per package instructions, fold the wings, insert, and tighten until the wings open and seat behind the drywall.
Hang the item and test for stability
With all fasteners in place, hang your item. Give it a gentle downward tug - not a yank - to check that it feels solid and doesn't shift or wobble. Step back and use your level one more time to confirm it's hanging straight. If it tilts, most hanging hardware allows minor adjustment without removing the item.
Use Painter's Tape to Plan Your Layout
Before drilling a single hole, cut strips of painter's tape the same dimensions as your item and stick them to the wall. This lets you visualize placement, spacing, and height without commitment. It's especially useful when hanging a gallery wall with multiple frames.
Common Mistakes and How to Avoid Them
Even careful beginners run into a few predictable problems. Here's what to watch for:
- Skipping weight verification: Weigh your item on a bathroom scale before you buy hardware. Guessing often leads to anchors that fail over time.
- Assuming all studs are 16 inches apart: While 16 inches is the standard spacing, it's not universal - always verify with a stud finder rather than measuring from a corner.
- Using drywall anchors in plaster: Plaster walls require different techniques. Plastic expansion anchors can crack plaster. In older homes, use toggle bolts or screw directly into the lath where possible.
- Hanging too many items on one anchor: Each anchor point carries part of the load, but if you cluster too many items on one small section of drywall, the cumulative stress can cause damage.
Never Guess With Electrical or Plumbing Behind Walls
Electrical wiring and plumbing pipes can run through wall cavities in locations that aren't obvious. A stud finder with AC detection can help identify live wires near the surface. If you're unsure - especially near kitchens, bathrooms, or electrical outlets - consult a licensed professional before drilling. Hitting a live wire or water line is a serious safety hazard.
For rooms where you're mounting multiple items as part of a broader organization effort - think entryways or shared living spaces - a little upfront planning goes a long way. Our guide on organizing shared spaces with different standards can help coordinate what gets hung where before you start drilling.