

Key Takeaways
What Each Air Filter Actually Does
Most cars have two separate air filters, and confusing them is a common mistake. Understanding what each one does helps you prioritize when to replace them.
Engine air filter: This filter sits between the outside air and your engine's intake system. Its job is to block dust, dirt, pollen, and debris from entering the engine where they could cause wear on cylinders and other moving parts. A clean engine air filter helps your engine breathe properly, which supports efficient combustion and fuel economy.
Cabin air filter: This filter cleans the air that flows through your car's heating, ventilation, and air conditioning (HVAC) system - the air you and your passengers breathe. It traps pollen, dust, mold spores, and exhaust particles before they reach the interior. A clogged cabin filter also reduces airflow, which means your AC and defrost may work less effectively.
Neither filter lasts forever, and letting either one go too long causes real problems - just different ones. As part of a broader maintenance routine, both filters appear in your owner's manual schedule. For a plain-language guide to reading that schedule, see our maintenance schedule explainer.
When to Replace Sooner Than the Schedule Says
If you frequently drive on unpaved roads, in dusty or high-pollen environments, or in stop-and-go city traffic, your filters will clog faster than the mileage interval suggests. Plan to inspect both filters at every oil change and replace them based on condition, not just mileage.
How to Inspect Both Filters
Before spending money on a replacement, take two minutes to look at what you have. Both filters are designed to be user-serviceable.
What you will need
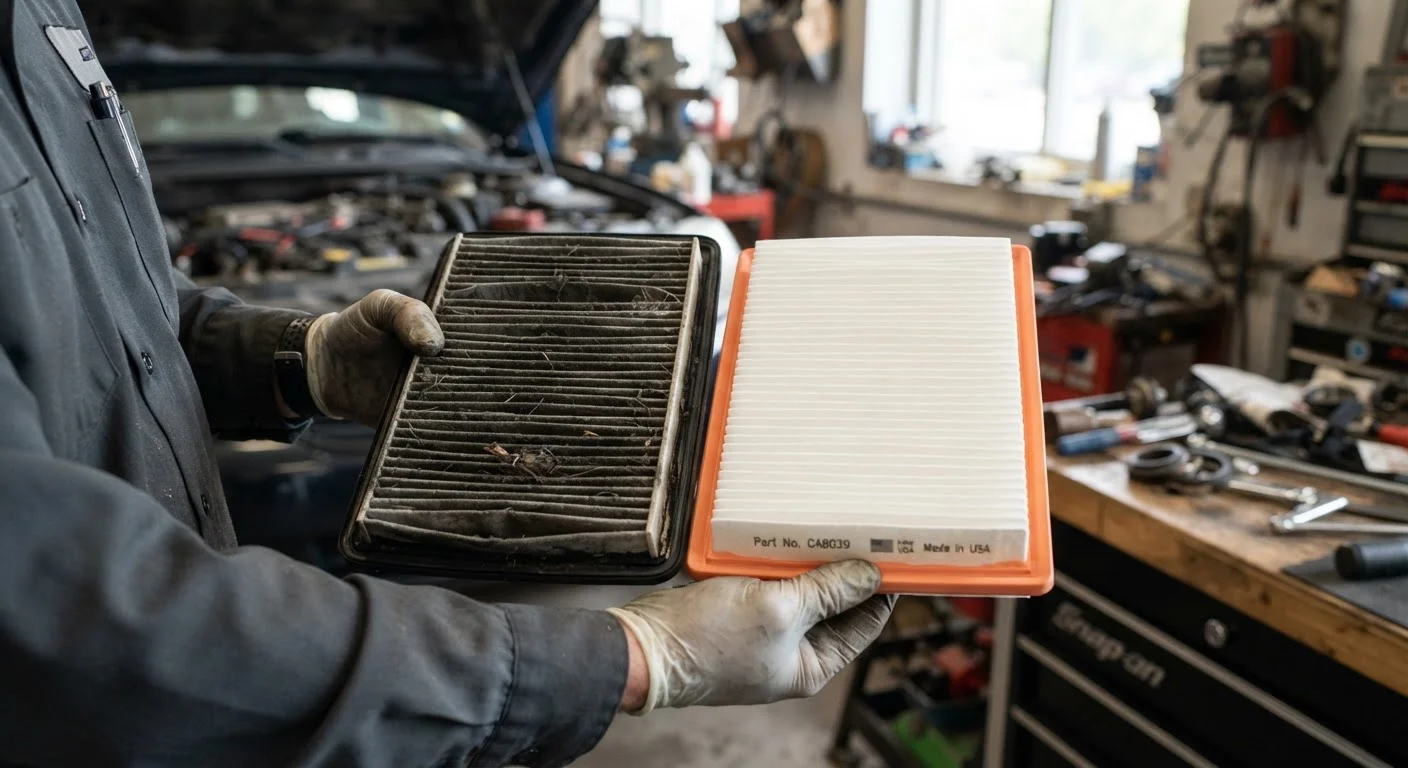
Engine air filter: Open the hood and locate the air filter housing - typically a black plastic box connected to a large hose near the engine. Unclip or unscrew the housing lid and lift out the filter. Hold it up to light. If it's gray or brown, visibly packed with debris, or you can't see light through it, it's time to replace it. A lightly dusty filter may still have life left.
Cabin air filter: The location varies by vehicle - most commonly it's behind the glove box, under the dashboard, or under the hood near the windshield. Check your owner's manual for the exact location. Once found, slide out the filter and inspect it the same way: excessive dirt, debris buildup, or a musty smell means it should go.
Don't Blow Out a Filter With Compressed Air
It may seem like a quick fix, but blowing compressed air through a used paper filter can tear the filter media and create invisible holes. Unfiltered air entering the engine carries abrasive particles that cause internal wear over time. When a filter is dirty enough to be a concern, replace it rather than trying to clean it.
Step-by-Step: Replacing Both Filters
Replacing either filter is one of the most beginner-friendly DIY maintenance tasks you can do. No special tools required for most vehicles.
Look up your filter part numbers
Before buying anything, check your owner's manual or an auto parts store's online catalog using your vehicle's year, make, model, and engine size. Using the wrong size filter can leave gaps that let unfiltered air bypass the system entirely.
Replace the engine air filter
Park on a flat surface and turn off the engine. Open the hood and locate the air filter housing. Unclip or unscrew the lid, noting how it's attached. Remove the old filter and discard it. Before inserting the new one, wipe the inside of the housing with a dry cloth to remove loose dust. Place the new filter in the same orientation as the old one - there's usually a visible fit or a rubber gasket that seats against the housing. Reattach the lid securely.
Replace the cabin air filter
Consult your owner's manual for the exact access point. In most vehicles, the glove box needs to be lowered or removed by pressing in the sides to clear the stop tabs. Slide out the old filter and note which direction the airflow arrows point - the new filter must go in with the arrows pointing the same way. Insert the new filter, reassemble the glove box or panel, and you're done.
Confirm everything is reassembled correctly
Start the engine and listen for any unusual sounds from the engine bay - a sucking or hissing noise can indicate a loose intake connection. Inside the car, turn on the fan and check that airflow feels normal from the vents. If anything seems off, recheck your work before driving.
If at any point the housing or components look unfamiliar or you're unsure, consult a qualified mechanic rather than guessing. Incorrect reassembly of the air intake system can cause engine problems.