

Key Takeaways
Start here
Why Every Home Needs a Basic Tool Kit
Core knowledge
The Core Tools and What They Actually Do
Go deeper
Understanding Drill Bits, Screws, and Fasteners
Stay safe
Safety Basics Before You Start Any Project
Know your limits
When Your Tools Aren't Enough
Why Every Home Needs a Basic Tool Kit
A loose cabinet hinge, a picture hook that needs moving, a curtain rod that won't stay level - small home tasks like these pile up fast. Without a basic tool kit, even minor fixes send you reaching for a phone to call a handyperson or waiting days for help that costs far more than the job warrants.
The good news: most everyday home repairs only require about seven tools. Once you understand what each one actually does, you'll feel far less intimidated by the hardware store aisle. This guide is built for people who are starting from scratch - no assumed knowledge, no jargon left unexplained.
If you're also working through a larger list of first-home tasks, the seasonal home maintenance checklist is a great companion resource for staying ahead of upkeep all year.
The Core Tools and What They Actually Do
Torque
The rotational force a drill applies when driving a screw. Higher torque drives screws into harder materials; adjusting the torque collar prevents overdriving.
Stud
A vertical wooden or metal framing member hidden inside your walls. Screwing into a stud gives a much stronger hold than screwing into drywall alone.
Pilot hole
A small hole drilled before inserting a screw. It guides the screw and prevents wood from splitting, especially in hardwood.
Wall anchor
A plastic or metal sleeve inserted into drywall that spreads the load of a screw over a wider area, allowing you to hang objects without hitting a stud.
Plumb
Perfectly vertical - straight up and down. A level tool checks for plumb just as it checks for level (horizontal).
Chuck
The clamping mechanism at the tip of a drill that holds the drill bit in place. Twist it to tighten or loosen the bit.
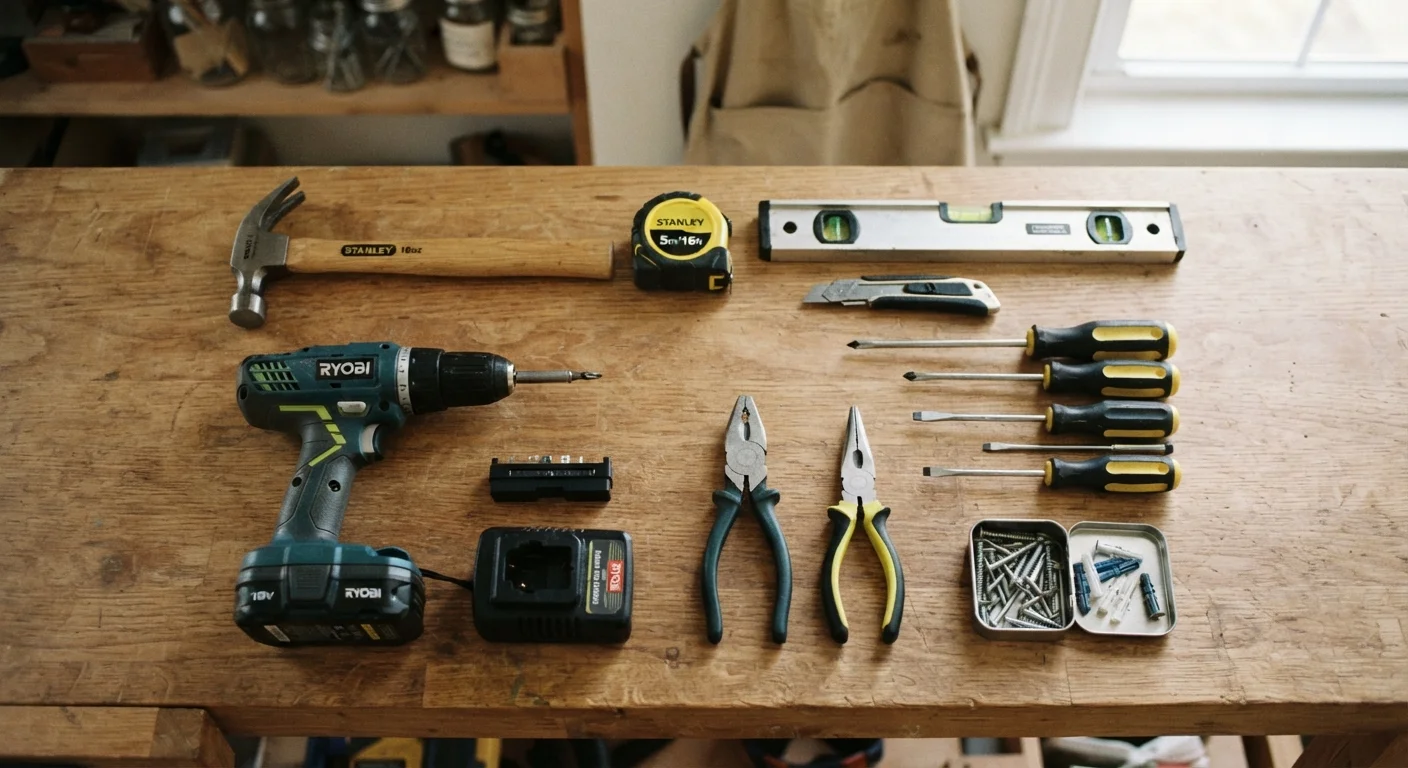
Here is an honest, plain-language breakdown of the tools you'll actually use:
- Hammer
- Drives nails into wood or drywall and removes them using the forked claw at the back. A standard 16-ounce claw hammer suits most household tasks. Hold it near the end of the handle - not the head - for better control.
- Flathead and Phillips screwdrivers
- Flathead has a single blade tip for straight-slot screws. Phillips has a cross-shaped tip for cross-head screws. Owning both in medium and small sizes covers nearly every screw you'll encounter around the house.
- Tape measure
- Measures distances accurately before cutting, hanging, or buying materials. Lock the blade in place while measuring so it doesn't spring back and cut your fingers - most tape measures have a sliding lock button on the body.
- Torpedo level
- A short, handheld tool with a liquid-filled bubble vial. When the bubble sits centered between the two lines, your surface is level (horizontal) or plumb (vertical). Use it any time you hang something on a wall.
- Slip-joint pliers
- Grip, turn, and hold objects that your fingers can't. The adjustable pivot lets you widen or narrow the jaw to fit different sizes. Useful for tightening loose nuts, pulling stubborn nails, and gripping pipes temporarily.
- Utility knife
- Scores drywall, opens packaging, trims materials, and cuts carpet or caulk. Always retract the blade after use and change blades when they dull - a dull blade requires more force and is more likely to slip.
- Cordless drill/driver
- Drives screws quickly and bores holes in wood, drywall, and plastic. The adjustable torque collar (the numbered ring near the chuck) controls how much force the drill applies before it stops spinning - preventing screws from sinking too deep.
Store Tools Where You'll Actually Use Them
A tool kit only helps if you can find it quickly. Keep your core tools in a single, portable tote or small toolbox stored in an accessible closet or cabinet - not buried in a basement. When a tool is always in the same place, small repairs take minutes instead of half an hour of searching.
Understanding Drill Bits, Screws, and Fasteners
Having a drill is only half the equation - you also need the right bit for the job. Drill bits are not interchangeable across materials.
- Twist bits: General-purpose bits designed for wood, plastic, and soft materials. The most common type included in starter sets.
- Masonry bits: Tipped with a harder material (usually carbide) to penetrate concrete, brick, and tile. They look similar to twist bits but have a blunt, wider tip.
- Screwdriver bits: Fit into your drill to drive screws instead of boring holes. Phillips and flathead versions are the most common.
For screws, length and gauge both matter. Longer screws hold more weight but require a pilot hole (a small pre-drilled guide hole) in hardwood to prevent splitting. The packaging usually states the recommended surface and load.
Wall anchors are plastic or metal sleeves inserted into drywall before a screw. They spread the load across a wider area when you can't screw directly into a wall stud (the wooden framing behind drywall). If you're hanging anything heavier than a small picture frame, locate a stud first using a stud finder - or knock along the wall listening for a solid, less hollow sound.
Drywall Anchors Have Weight Ratings
Every wall anchor package lists a maximum weight capacity. This figure matters - exceeding it can cause the anchor to pull through the drywall, damaging the wall and dropping whatever you hung. When hanging heavier items like mirrors or shelving, always aim to hit at least one wall stud in addition to using anchors.
Safety Basics Before You Start Any Project
Tools extend your physical capability, which means they can also extend the consequences of a mistake. These habits are non-negotiable for beginners:
- Wear safety glasses whenever you're drilling, hammering, or cutting. Debris moves faster than you expect.
- Read the tool's label or manual before first use. Torque limits, recommended materials, and charging instructions are there for a reason.
- Unplug or power down any tool before changing a blade or bit.
- Know what's inside your walls before drilling. Electrical wires and plumbing pipes run through wall cavities. If you're unsure, use a multi-scanner (available at hardware stores) that detects both studs and live wires.
- Keep your workspace clear. Tripping over a cord while holding a drill is a common cause of tool-related injuries.
For any project involving cuts or punctures, it's worth brushing up on basic first aid responses so you're prepared if a minor accident happens.
When Your Tools Aren't Enough
A home tool kit is designed for surface-level repairs and improvements - not for everything that can go wrong in a house. Some jobs genuinely require licensed professionals, and recognizing the boundary is one of the most important skills a new homeowner can develop.
Always call a licensed professional for:
- Any work on electrical wiring, panels, or outlets - shock and fire risk
- Gas lines of any kind - explosion and carbon monoxide risk
- Load-bearing walls or structural modifications - collapse risk
- Main water line or sewer connections - flooding and contamination risk
- Roofing repairs beyond a missing shingle - fall risk and code requirements
Many of these jobs also require permits and inspections under local building codes. Unpermitted work can create serious problems when you sell the home or make an insurance claim. When in doubt, consult a professional before you start.
For a fuller picture of where the DIY line falls, the DIY home repairs guide walks through specific scenarios and helps you judge each one honestly.