

Key Takeaways
How the Fill Valve and Flapper Work Together
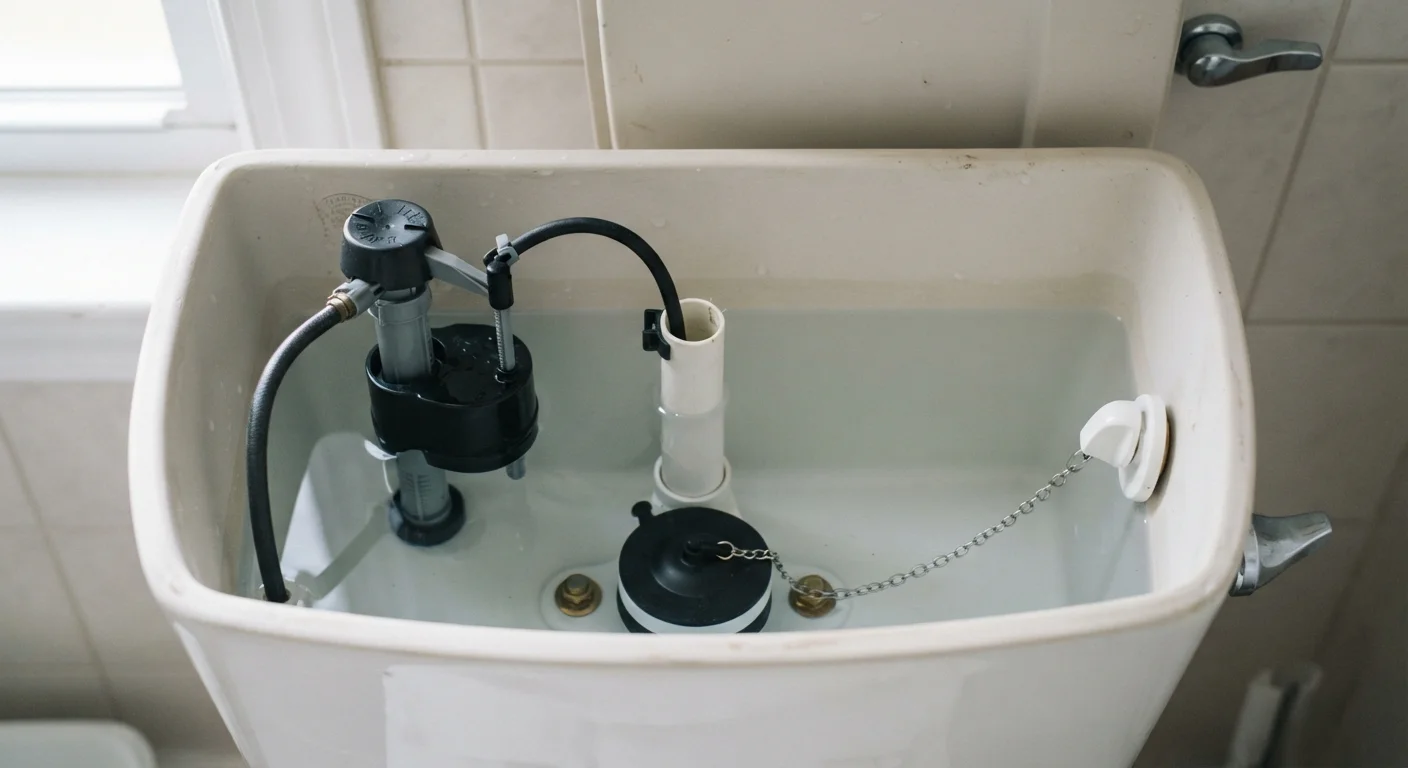
Every toilet tank contains just a handful of moving parts, and understanding what each one does makes diagnosis straightforward. When you press the handle, it lifts a chain that pulls open the flapper - a rubber seal sitting over the flush valve opening at the tank floor. Water rushes from the tank down into the bowl, creating the flush. Once the tank empties, the flapper drops back down and creates a watertight seal.
At the same time, the fill valve detects that the water level has dropped (via a float mechanism) and opens to let fresh water in from the supply line. As the tank refills, the float rises with the water level. When it reaches the correct height, the fill valve shuts off automatically.
A running toilet means this cycle isn't completing properly: either the flapper isn't sealing (so water leaks continuously into the bowl) or the fill valve isn't shutting off (so water overflows into the overflow tube). Both problems are fixable without calling a plumber.
Use the Food Coloring Leak Test
Add a few drops of food coloring to the tank and wait 10-15 minutes without flushing. If color appears in the bowl, your flapper is leaking - even if it looks fine. This test takes 30 seconds and immediately pinpoints the most common cause of a running toilet.
What You'll Need Before You Start
Gather everything listed below before opening the tank. Having parts on hand means you won't need to leave mid-repair with the water shut off.
What you will need
Adjustable pliers
Used to loosen and tighten the fill valve locknut beneath the tank.
Replacement flapper
Replaces the worn rubber seal that controls water flow from the tank into the bowl.
Replacement fill valve
Replaces the mechanism that refills the tank with water after each flush.
Sponge or towel
Absorbs residual water left in the tank after shutting off the supply.
Bucket
Catches water when disconnecting the supply line during fill valve replacement.
When buying a replacement flapper, either bring the old one with you for a physical match or look up your toilet's model number - it's usually printed inside the tank lid or on the back wall of the bowl near the base.
Step-by-Step: Diagnosing and Fixing the Problem
Turn Off the Water Supply First
Before opening the tank or touching any internal parts, locate the shut-off valve on the wall behind or beneath your toilet and turn it clockwise until it stops. Skipping this step means water will keep flowing as you work. If your shut-off valve is stuck or leaking, contact a licensed plumber before proceeding.
Remove the tank lid and observe the parts
Lift the porcelain lid off the back of the toilet and set it safely on a flat surface - it's heavy and brittle. Look inside and identify three key components: the flapper (a rubber flap at the bottom of the tank), the fill valve (a tall vertical assembly, usually on the left side), and the float (a ball or cup attached to the fill valve that rises with the water level).
Diagnose whether the flapper or fill valve is the problem
Listen carefully and watch the water. If you hear a hissing sound and the water level is above the overflow tube (the tall open pipe in the center), the fill valve is letting in too much water. If the water level looks normal but the toilet runs intermittently, the flapper is the likely culprit - press down on it with your finger. If the running stops immediately, replace the flapper.
Shut off the water and flush the tank empty
Turn the shut-off valve clockwise until fully closed. Flush the toilet - the tank will drain and not refill. Use a sponge or towel to absorb any remaining water in the bottom of the tank so you have a dry workspace.
Replace the flapper (if that's the faulty part)
Unhook the old flapper from the two pegs on either side of the overflow tube, then unhook the chain from the flush handle arm. Take the old flapper to a hardware store to match the size, or note your toilet model number (often stamped inside the tank lid) to find the correct replacement. Snap the new flapper onto the overflow tube pegs and reconnect the chain, leaving about ½ inch of slack - too tight and the flapper won't seal; too loose and it won't lift fully during a flush.
Replace the fill valve (if that's the faulty part)
With the tank empty, disconnect the water supply line from the bottom of the tank (have a bucket ready for drips). Use adjustable pliers to loosen the locknut holding the fill valve in place - turn counterclockwise. Lift the old fill valve straight out. Insert the new fill valve, following the manufacturer's instructions to set the height so the water line will sit about 1 inch below the top of the overflow tube. Hand-tighten the locknut, then snug it a quarter-turn with pliers. Reconnect the refill tube to the overflow tube.
Restore water and test your repair
Slowly turn the shut-off valve counterclockwise to restore water flow. Watch the tank fill - the water should rise and stop cleanly about 1 inch below the overflow tube. Flush once and observe. The tank should refill completely and the running sound should stop within 60-90 seconds. If running continues, recheck the flapper chain tension and the fill valve water-level adjustment.
When to Call a Plumber Instead
This repair is genuinely beginner-friendly in the vast majority of cases. However, there are a few situations where professional help is the right call:
- The shut-off valve behind the toilet is stuck, corroded, or leaking at its base.
- The tank has visible cracks or water pooling around its base.
- The supply line connection points show corrosion or the threads are stripped.
- After replacing both the flapper and fill valve, the toilet still runs - this may indicate a less common issue such as a cracked overflow tube or damaged flush valve seat.
A licensed plumber can assess these issues quickly, and addressing them promptly prevents water damage and higher water bills over time.